Hello, moms! In this post, we will cover proper posturing and ergonomics for all of the day-to-day activities you do as a mother.
Whether this is your first rodeo into the adventure that is motherhood or you’re already a seasoned mama, this blog on ergonomics is for you.
By the time you are done reading, I hope you can champion motherhood with less risk of low back pain, upper back stiffness, and injury while caring for your little one.
What Is Ergonomics?
Ergonomics is the study of people in their surrounding environment and the process in which said environment and products are designed or rearranged so that they fit the people who use them. The purpose of ergonomics is to improve the ability to move functionally, increase productivity, and reduce injuries.
You’ll typically hear ergonomics in conjunction with optimizing the workplace, but this applies to motherhood tasks as well. So in this post, we cover the proper ergonomics of wearing your baby, feeding your baby, carrying a car seat, and pushing a stroller so you can stay healthy and be an unstoppable mama.
General Posture
A quick disclaimer: Since everybody is different, “proper” posture will also look slightly different on every body. With that said, generally, good posturing emphasizes stacking the different units of your body over each other. Specifically, your head over your ribs over your hips over your feet.
A simple way to check how well you are stacking your body is by using a stick (ski pole, broomstick, Swiffer, curtain rod, etc). Have the stick be in contact with the back of your head, between the shoulder blades on the ribs, and at your tailbone.
If you can maintain all 3 points of contact, then you likely have a good foundational posture. If you are missing one point of contact, then there’s a chance that your posture could use some attention from a physical therapist.
A common posture we see during and after pregnancy is sending your hips forward and in front of your ribs and feet. The reasons why this posture isn’t ideal?
- You rely on the ligaments in the front of your hips to stabilize your spine and hips, instead of your core and your glutes (back of the hip muscles).
- There’s increased extension (or arching) in the low back, which can lead to low back pain or hip pain over time.
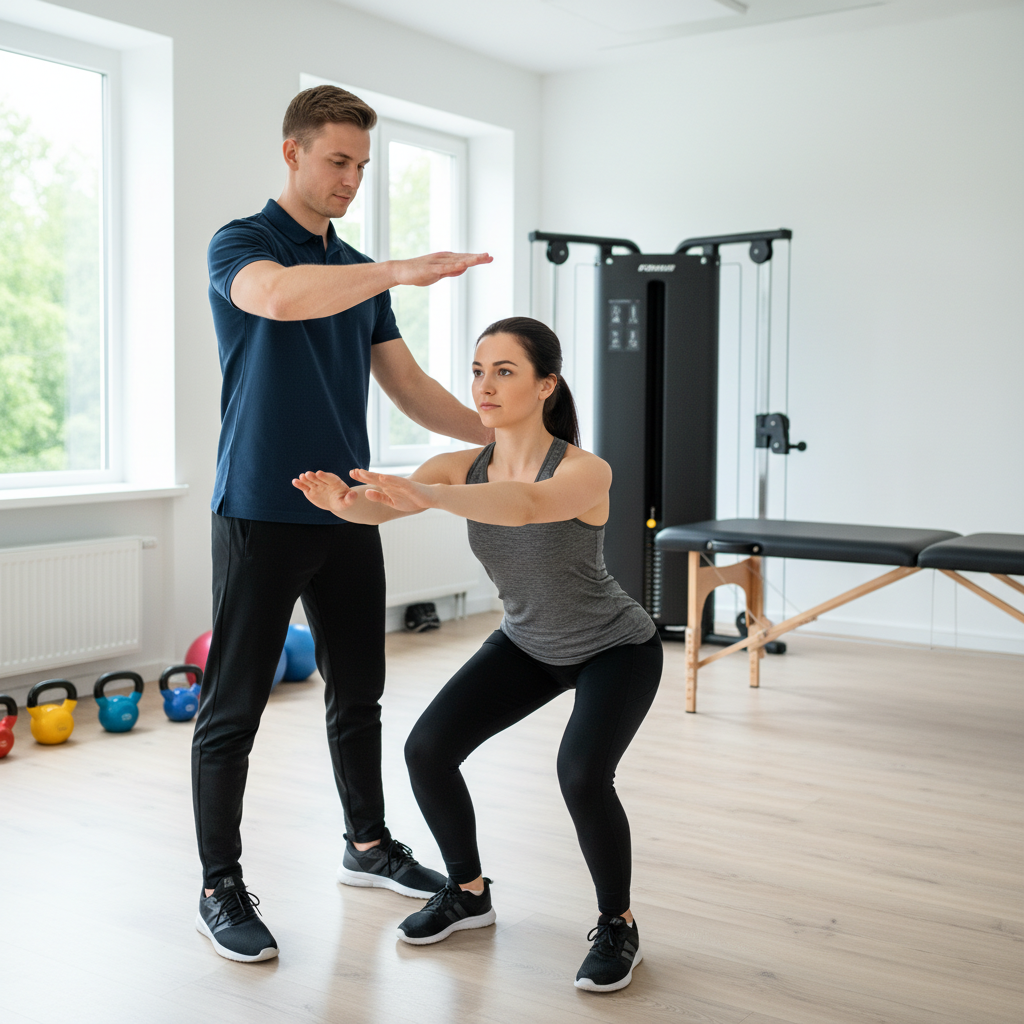
To improve your posture, consider trying the stick trick above and strengthening your deep core and glutes. If you are still finding some difficulty with getting yourself stacked or have additional questions, book a discovery call today!
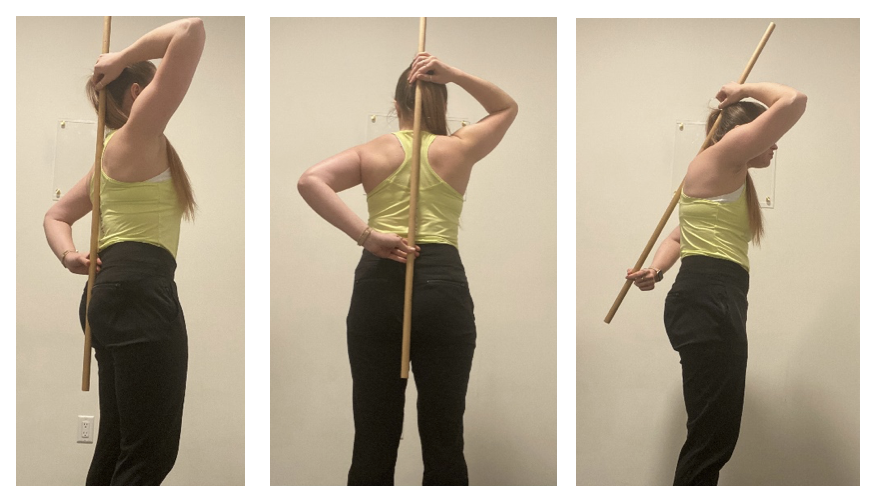
Right: Only 2 points of contact when using the dowel, indicating compensations in posture.
Baby Holding
One of life’s greatest joys is being able to hold your baby. Although I want you to explore the different ways you move around and bond with your little one, I do want to offer some tips on how to hold your baby in a way that promotes good posture and minimizes back pain.
Carry your newborn at your chest in front of you, either with one hand or two. If your little one does not have great head control yet, use one arm to support your child’s head while the other is supporting under their bottom.
If you find yourself holding your baby in one arm (often the non-dominant one), try to switch arms frequently to load each side evenly. If you carry your baby at your side, avoid jutting your hip out because this can contribute to poor posture and pain. And aim to switch sides every 15-20 minutes.
Keeping your weight evenly distributed in your feet can help avoid excessive shifting and promote improved core engagement naturally.
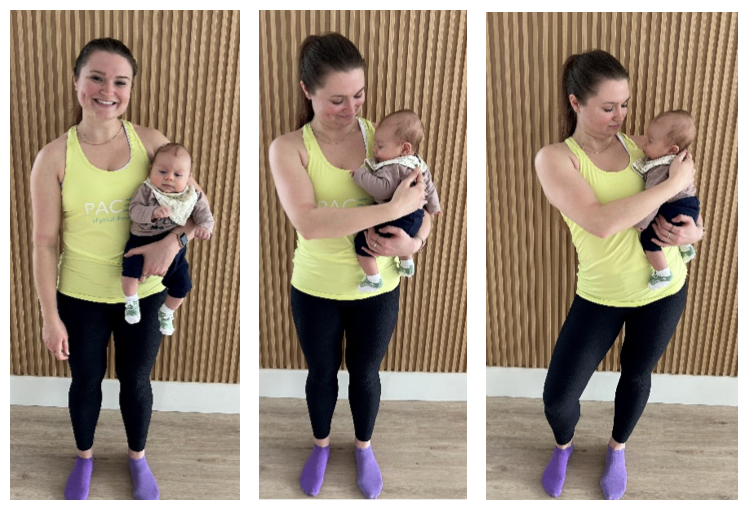
Right: avoid jutting out the hip to support the baby, as this promotes an uneven posture
Baby Wearing With a Carrier
Especially in that first year, you are going to be wearing your baby in a carrier quite often. Let’s talk about how to properly wear one.
For starters, there are many different types of carriers. Newborn (or mini) carriers typically only have straps over the shoulders:
- Some have parallel ones over the shoulders (like a backpack) that buckle in the back to prevent the straps from sliding off the shoulders.
- Some have straps that criss-cross in the back.
For both styles, make sure that the buckling strap and/or the criss-cross are at shoulder blade level, instead of up towards your neck. This positioning opens up your chest more and promotes upright posturing, instead of being hunched over and potentially developing upper back, neck, or shoulder pain.
As your baby grows, you will likely scale up to a larger carrier that comes with a waist strap. To properly don this type of carrier, first clip the waist belt over your hips (just like a hiking backpack if you’ve used one before), then adjust the shoulder straps making sure that the clip or cross is between the shoulder blades (as mentioned above).
Although it may be super tempting to wear that belt over your waist and across your lower back, it’s not the most supportive and ergonomically friendly way! Your hip bones form a bony bowl and provide better support for carrying the weight of a newborn than wearing it over your abdomen.
If you keep the waist belt over your waist, then the weight of the newborn in front of you causes excessive arching in your lower back, disrupts your posture, and can lead to lower back pain.
Tip: If you feel like your baby is low in the carrier in this position, roll up a towel or blanket and put it in the bottom of the carrier underneath your baby to boost them up a bit higher.
Once you have your carrier and baby on you, take a moment to think about your posture. Ideally, your ribs should be stacked over your hips and your hips shouldn’t be too far forward anymore! Each body is different, so if this does not work for you, you can come in for an ergonomic assessment by team so we can help you avoid discomfort. ook a call with us.
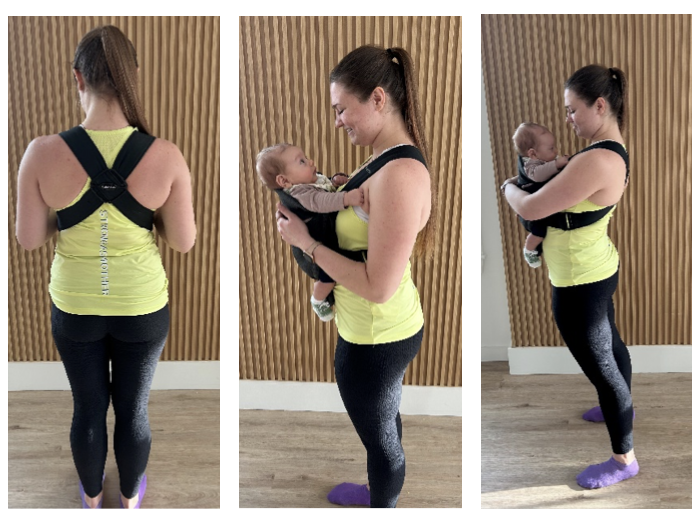
Center: the carrier is fit in a way that promotes good stacking of ribs over hips
Right: avoid sending hips forward past the ribs and arching the lower back
Feeding
When feeding your little one, bring the baby to you instead of you to the baby. This helps avoid slouching forward and eventually developing upper back, shoulder, and/or neck pain. This is true for both breastfeeding mamas as well as those who bottle feed.
If breastfeeding, consider feeding in a side-lying position, in which you and the baby are supported by pillows and the surface you’re lying on.
Tip: Be sure to switch sides often as this helps with your baby’s development.
If you prefer feeding while seated, consider assuming a reclined position, having your feet flat on the floor, and using lots of pillows to support you and your baby.
Let the pillows do the work, not your body. Create a nest of pillows and try stacking a pillow and then a boppy on top if that feels better for you. (This tip is for those who are bottle or breastfeeding.)
While feeding your little one, consider checking in with your body — be sure you are not tensing your shoulders or bringing your neck forward to look down. Deep breathing can aid in full-body relaxation.
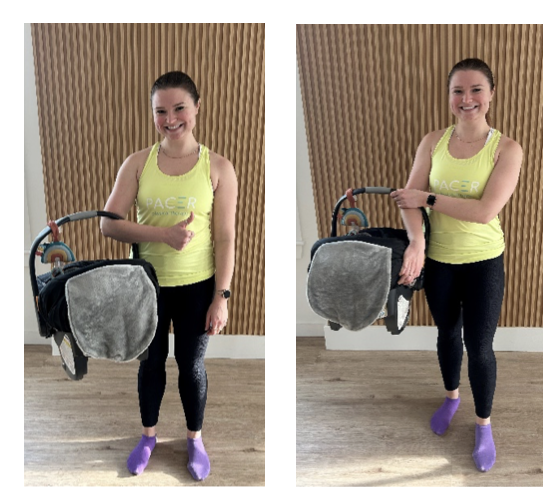
Car Seat Carrying
We encourage the “wrap method” when carrying a car seat.
Bring your arm through the handle, so that the handle rests at the groove of your elbow. You can either wrap the hand over the front of the car seat (if there’s a groove for a handhold there) or let the hand rest.
For extra support, you can use your free arm to hug the handle close to your body. This method makes it easier to stand upright and walk comfortably than when you hold onto the handle with your hand.
However, there’s a lot of variety when it comes to car seats. It can take some experimenting to find a carrying position that feels most comfortable for you.
Tip: If you are pregnant or simply want to practice without a car seat, try this with a shopping basket at the grocery store.
Stroller Pushing
Before moving with the stroller, make sure it’s set up in a way that works best with your body. The stroller handles should be set to a height that allows your elbows to be bent at a 90-degree angle, your wrists slightly extended past neutral, and your hands relaxed.
Lean into the stroller as you walk, instead of relying on your chest muscles and biceps to push the stroller away. Maintaining good arm positioning and leveraging your body weight to propel the stroller forward will protect your elbows, wrists, and hands from excessive strain.
Tip: If you are pregnant or simply want to practice but don’t have a stroller yet, try this with a shopping cart at the grocery store. (You might need to add a few items first to make pushing more challenging.)

Right: Not recommended method of stroller-pushing – relying on chest muscles and biceps to push, while sending the hips forward and extending your wrists
Need Postpartum Ergonomics Help? Reach Out
We covered a lot of information so congrats on making it to the end of this blog. Try these tips with your baby and encourage your partner, friends, and family to do the same!
Prioritizing ergonomics goes a long way in decreasing the chance of developing pain. And although postpartum pain is common, it’s not normal. So if you are experiencing pain or have additional questions, book a discovery call today, and I’d love to help you out!
You got this!
Dr. Vera
Recap
Follow us on Instagram for more posts like this!